
Imagine having digital publishing, monetization, and analytics tools in one platform. Instead of switching between Instagram’s Business Suite for posts and WhatsApp for engagement, Meta Business Suite combines these functions and more in one place. Sound interesting? Keep reading.
As a busy professional, you have a lot on your plate daily, including fast-paced innovation, multiple teams managing different parts of the company, and relentless competition. Naturally, you’re always searching for the best tool to make your life easier and meet your needs. For small businesses, having all the necessary tools in one place at a low or no cost can significantly improve operations.
Whether you’re an experienced social media manager or just starting out, this guide will show you how to set up and use Meta Business Suite and answer common questions. Let’s get started.
Key Points
- Instead of using different tools for creating content, tracking analytics, and publishing, Meta Business Suite combines all these functions.
- Meta Business Suite simplifies the process of creating and scheduling posts and reels for both Facebook and Instagram.
- The Insights section offers comprehensive metrics on content performance, audience demographics, and campaign results.
- The Inbox feature combines messages, comments, and replies from Instagram and Facebook into one place.
- Meta Business Suite provides tools for monetization through features like Stars, in-stream ads, and branded content.
What is Meta Business Suite?
Meta Business Suite began in 2012 when Facebook Inc. (now Meta) bought Instagram for $1 billion. 2014 Facebook Business Manager was introduced, but it wasn’t until 2020 that Meta Business Suite came to be. Now, companies can manage their Facebook and Instagram activities without switching between platforms.
This was great news for marketers since Facebook is the top social media platform for marketing (89%), with Instagram in second place (80%). You can access the dashboard through Facebook, download Meta Business Suite for desktop, or use the Meta Business Suite app.
As a digital marketer, managing multiple social media accounts was like juggling flaming torches. Each platform had its quirks, and it took a lot of work to keep up. Then, I found Meta Business Suite. This tool changed everything, making my job much easier and saving me a lot of time.
Instead of using different tools for creating content, tracking analytics, and publishing, Meta Business Suite combines all these functions. It works like a control center, allowing you to easily manage various marketing tasks on Facebook and Instagram, saving you time and money on other subscriptions and effort.
Is Meta Business Suite Different From Facebook (Meta) Business Manager?
Yes, they are different! Meta Business Suite and Meta Business Manager are not the same.
Let’s see how.
Meta Business Suite helps you manage marketing operations on Facebook and Instagram. Meta Business Manager, on the other hand, helps keep your assets on these platforms safe and secure. Like the Suite, it lets you manage permissions for all your Meta accounts and set up security and privacy measures.
If you decide to use Meta Business Suite, you’ll be happy to know that Business Manager works alongside it.
Now let’s see some features of Meta Business Suite that might be helpful for your business.
Meta Business Suite Features
On the left side, you’ll see a list of different actions. A drop-down menu at the top shows your brand’s name and all connected accounts. You can view and switch between any other connected accounts here.
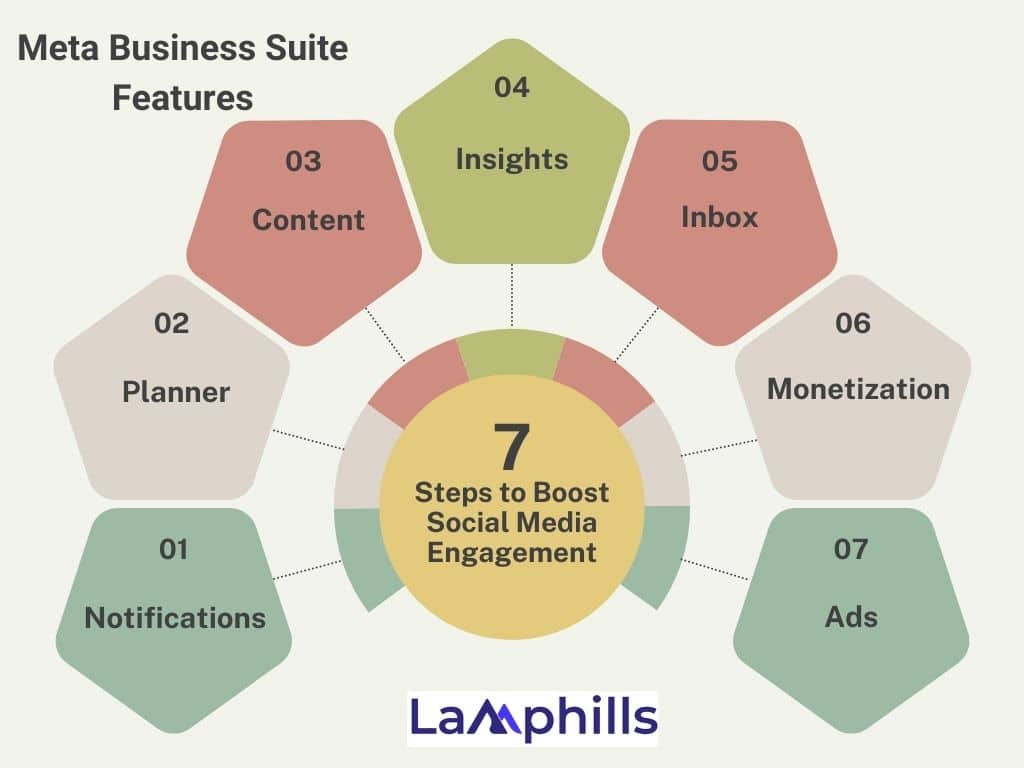
Let’s look at each section in the Business Suite:
#1. Notifications
Under the home tab, you will find all your notifications. They are divided into “High priority,” “Suggestions,” and “Other notifications.” Clicking on a notification will take you to the post insights, where you can export data if you want.
At the top of the notifications tab, there are three filter options. You can choose between different notifications, mark all messages as read, and set your notification preferences for your Facebook and Instagram pages. By hovering over a notification, you can also mark it as unread.
#2. Planner
The next tab in Business Suite is the Planner. When you open it, you’ll see a calendar showing all your posted and scheduled content for the coming week or month. You can filter the content by selecting the “Content-type” drop-down menu or see where it was shared by clicking on the “Shared to” option. To schedule a new post, click “Create post” or “Create reel” in the top right corner.
How to Create Content in Meta Business Suite
Creating content in Meta Business Suite is easy and works like most content planning tools.
Create Post
To create a post, you can create a story, bulk upload videos, post a video across pages, or go live. First, decide whether to post on Facebook, Instagram, or both for a regular post. Then, upload your content with up to 10 images and videos, and add your caption, including hashtags, emojis, location, and tags.
You can customize each caption by toggling on “Customize post for Facebook and Instagram.” You can create A/B testing, enable direct messaging, and add a link preview for Facebook only.
To schedule your post for a specific date, toggle on the Scheduling options. You can select your posts to go out simultaneously on both platforms or choose different times for Facebook and Instagram. To see when your followers are most active, click on the Active times option for the ideal posting times.
Preview your post on your Facebook and Instagram feeds on the right-hand side before publishing. Set the privacy for your post to Public or Restricted, deciding who can see it. Before posting, you can also toggle on Boost to sponsor the post.
Finally, select Finish later to save your post as a draft, or Schedule it, and the post will appear on the calendar.
Create Reel
Creating a reel is similar to making a regular post, but you’ll only upload one video. First, add your caption and tag any collaborators, then click Next.
Now it’s time to edit your video. You can add music, crop the video, insert text, or add enhancements. Preview your video for both Facebook and Instagram feeds. Once you’re happy with your edits, click Next again.
You can choose to share the video now, schedule it for later, or save it as a draft. For Facebook, you can add reel remixing, allowing others to remix and duet your Reels. You can also toggle on “Allow Gifts” so fans can give you gifts and Stars. Lastly, select who will see your video, either Public or Restricted. Press Share to publish or schedule your reel.
#3. Content
In the Content section, you can see all your published, scheduled, drafted, expiring, and expired content. You can filter by post type, search by ID, and choose a specific time period. For each post, you can view analytics such as impressions, reach, comments, shares, likes, reactions, and minutes viewed for videos. You can also boost posts that are available for promotion.
On the left side, you can switch between different content types. These include:
- Posts and Reels
- Stories
- A/B Test
- Feeds & Grids
- Memories & Tags
- Clips, etc.
You can view your content’s analytics here or in the Insights section for more detailed metrics and an account overview.
#4. Insights
The Insights section lets you see an overview of your Facebook and Instagram account metrics, including paid ads. You can view the results of your content and campaigns and even set goals to reach.
In addition to this, you can see your current audience’s demographic information, such as age, gender, top cities, and top countries. You can also view your potential audience to estimate your audience size, age, gender, cities, and countries. These predictions can help you create new content and campaigns to maximize your efforts. The Benchmarking section shows how you compare against your competitors and similar brands in your industry.
Go deeper into your content and video analytics to view average reach, impressions, and top-performing posts. You can also see top-performing video content, compare your page against others, and view audience trends, returning viewers, and audience retention. At the bottom of this page, you can view any video earnings.
#5. Inbox
You can view messages, comments, and replies for Instagram and Facebook in one place. You can also use filters to sort through specific messages and mark them as needed.
In the top right corner, you will see buttons for Automation, Create messaging ad, Availability, and Settings. You can set up inbox automation to create instant replies. Choose the channel you want to set this up on, decide what action will trigger the instant message, and write your specific message.
You can also create ads through messaging. Set your status to Available or Away based on whether you want to be notified of messages. In Settings, set up your Messenger URL and chat plugins, and use ads to get more messages.
#6. Monetization
If you have monetized products, active subscriptions, Stars, or in-stream ads, you can view your monetization insights here. Want to learn more about monetization? Click on the Education tab to start monetizing your content and accounts.
Stars lets you earn money when followers support your content with Stars. To enable this, make sure your account is eligible. Viewers can give Stars on your gaming, live, photo, and text content. Facebook Stars might also be automatically enabled for public Reels, photos, and text posts.
In this section, you can also monetize your branded content and check whether you’re eligible to add a branded content tag to your posts.
#7. Ads
This section shows all your active ads and insights. The Ads Overview tab shows the total reach, post engagements, link clicks, and page likes your ads have received during a selected period.
You can view a list of your recent ads, audience insights, and any recommendations from the platform. Click Create an ad in the top right corner to create a new ad. The All Ads tab shows your ad’s reach, results, and amount spent. You can also click on Duplicate or View results for more detailed insights into your campaign.
#8. All Tools
Meta Business Suite offers many tools to help you with everything. You can engage with your audience, analyze and create reports, sell products, manage tasks, and run ads. It provides all the insights and tools you need to manage your Facebook and Instagram accounts in one place.
Do you have Facebook and Instagram business accounts for your brand or organization? If so, you should use Meta Business Suite. It offers free tools for managing content, ads, and insights to help you connect with your audience, among many other benefits.
Benefits of Using Meta Business Suite
What can you do with Meta Business Suite? Here are some of the app’s biggest advantages.
1. Centralized Social Media Management: Managing multiple accounts can take a lot of time. Meta Business Suite brings all your business activities on Facebook, Messenger, and Instagram into one place.
2. Connecting your social accounts to third-party tools. If you want to use a social media management tool like Sprout Social, you’ll need to connect your accounts through Meta Business Suite.
3. Social media insights. Want to see how your ads are doing? How do people respond to your content? What types of people interact with your business pages? Meta Business Suite gives you valuable performance, engagement, and audience data.
4. Post-Scheduling and Content Planning: Easily draft, schedule, and publish content in advance on your Meta business channels.
5. Prioritized Notifications: Your Notifications tab displays meaningful interactions like comments and messages, making it easy to respond quickly.
6. Inbox Management: Meta Business Suite brings all your Instagram and Facebook messages into one inbox and uses automation to help you quickly organize and reply to messages and comments.
Already excited about how Meta Business Suite can make your business run more smoothly? Let me show you how to use Meta Business Suite to manage your Facebook and Instagram accounts.
How to Set Up and Use Meta Business Suite to Manage Facebook and Instagram
Here are simple, step-by-step instructions for using Meta Business Suite to manage your Facebook and Instagram accounts.
#1. Create a Facebook Page
To use Meta Business Suite, your business needs a Facebook Page. Go to ‘Pages’ on your Facebook account and click ‘Create New Page.’ Follow the steps to set up and customize your page.
#2. Download the Meta Business Suite App or Access the Platform on the Desktop
Go to business.facebook.com or download the Meta Business Suite app on Android or iOS. To use this app, you need a Facebook account with a Business Page.
#3. Link Your Accounts
Meta Business Suite lets you manage all your social media accounts in one place. When I linked my Facebook and Instagram accounts, it was such a relief. Here’s how you can do it too:
How to Connect Facebook Pages to Meta Business Suite
1. Go to Meta Business Suite on a computer or download and open the app on an iPhone or Android phone.
2. Sign in or set up a new account by following the instructions on the screen.
3. Click on the dropdown menu at the top left corner.
4. Click the “+Create a business account” button and follow the instructions on the screen.
5. Connect your account on your computer or through the app. Sometimes, Meta will automatically link your Facebook business page to your Meta Business Suite account, so you might not need to do this step.
How to Connect and Manage an Instagram Account with Meta Business Suite
Just like you do with your Facebook business page, you need an Instagram business account to link it to the Meta Business Suite.
To link an Instagram account to your Business Suite, follow these steps:
1. Open the Meta Business Suite desktop app and click “Settings” on the left sidebar.
2. Click “Business Assets.”
3. Click “Add Assets” and choose “Instagram account.”
4. Read and agree to Meta’s terms for linking your Instagram account, then click “Claim Instagram account.”
5. A new window will appear. Type your Instagram username and password, and click “Log In.” If you are already logged into Instagram, click “Continue as [Instagram handle]” to use that account. If you want to use a different account, click “Switch accounts.”
6. If you use Two-Factor Authentication, Meta will ask you for a security code.
7. Click “Confirm.”
Once you add your Instagram account, you will receive a message confirming that it’s linked. You may need to sign in to Instagram again to change your account settings and permissions.
Here’s a set-up checklist to guide you through. If you’re new to Meta Business Suite, this checklist will help you set everything up smoothly.
Whether you’re linking your social media accounts, setting up your ad accounts, or organizing your inbox, we’ve got you covered. Follow these easy steps to get your Meta Business Suite ready to manage your business on Facebook and Instagram.
How to Start Using Meta Business Suite
After linking your Facebook and Instagram accounts to Meta Business Suite, follow these steps to start:
#1. Connect and Manage Your Ad Accounts
To add an ad account in Business Suite:
1. Go to Settings.
2. Click on Accounts from the left menu, then click on Ad Accounts.
3. Click the blue button that says ‘Add ad accounts.’
4. You can either add an ad account, request access to one, or create a new one.
5. If you’re adding or requesting access, type in the ad account ID. Then follow the instructions to set permissions for others.
#2. Update Your Organization’s Information
To change your details in Business Suite:
1. Go to Settings.
2. Click on Business Account Info.
3. Click the Edit buttons next to the information you want to update, like your business name, main page, legal name, address, phone number, and website.
4. Click Save.
5. To update your email, confirm the change through the confirmation email sent to you. If you don’t see it, check your spam folder. To resend the confirmation email, go to My info and click Resend email.
Expert Tips to Managing Your Facebook Pages and Instagram Accounts
Meta Business Suite offers tools that can propel your business forward, helping you improve customer service or manage your online presence more effectively.
#1. Build Customer Relationships
Tracking every customer interaction is tough. You may get notifications, but going through them all takes time. The Business Suite lets you receive and reply to messages on Instagram, Facebook, Messenger, and WhatsApp from one place. This means you won’t miss important customer messages and can offer more personalized service.
You can also organize messages with labels, assign them to team members, and set up automatic replies for when you’re not available. Many customer support agents need to switch between systems to handle requests because they need more information about the customer. Meta Business Suite helps save customer details and add notes to their profiles to keep interactions relevant and consistent.
#2. Use the Creator Studio to Create, Publish, and Manage Posts
Creator Studio in Meta Business Suite makes creating, scheduling, and sharing posts and stories easy. You can make a simple post by adding a high-quality photo, editing it, and adding details. This lets you create appealing posts for your followers. You can preview your posts and stories to see them from your audience’s perspective. When ready, you can schedule and manage your content.
Note: You can create a content calendar to help keep your social media posts organized. My first content calendar turned my messy schedule into a smooth operation.
Also, scheduling posts ahead of time ensures you never miss a deadline. It saves time and helps you plan better content.
#3. Track Your Performance
Do you want to see how your content is doing? This is especially important if you’re spending a lot on ads. The Insights tab shows various reports with data like likes, comments, shares, and more, helping you see if your strategy is effective.
You’ll know it’s time to change or improve your approach if it’s not working. Meta Business Suite gives you insights from each connected platform, allowing you to compare performance across different platforms and focus on what needs more attention. The Suite also offers goal-setting features and A/B testing capabilities, letting you test two post versions to see which one your audience prefers. This helps you understand what your audience likes and how to cater to their interests in future content.
Wrap Up
Mastering Meta Business Suite has changed how I manage social media for my clients. Its efficiency and insights let me focus on creating great content and engaging with my audience. As you start using Meta Business Suite, take it one step at a time. Explore its features, try different strategies, and use the data to guide you. With this tool, you’ll be on your way to social media success.
What challenges have you faced in managing your social media, and how do you plan to overcome them with Meta Business Suite?
Answers to Frequently Asked Questions
Do you have more questions? These FAQs will help you understand how to use Meta Business Suite better.
Do You Need a Facebook Account to Use Meta Business?
To start using Meta Business Suite, you need a Facebook business Page or an Instagram business account. If you already have one, follow these steps to create a business account in Meta Business Suite:
1. Go to Meta Business Suite on your computer, or
2. Download and open the Meta Business Suite app on your iPhone or Android phone.
How Do I Contact Meta Support?
If you can’t find the answer in the knowledge center, you can talk to Meta support through the Help Center. You’ll see a list of your accounts and profiles on the main page. Click on the one you need help with and provide the required information. Then, click ‘Start Chat’ to talk to a support agent.
You can also quickly start a live chat by clicking on the ‘Help’ button in your Meta Business Suite dashboard. Open the ‘Help’ menu, scroll down, and click on ‘Contact support team.’
What Do I Do if an Employee Leaves and I Lose Access to a Page?
If you lose access to a page because the only admin was a former employee, you can ask Facebook Support for help. Use one of the contact methods above to report a Page admin dispute. Make sure you have your government ID, a business document, and a dispute letter in PDF ready. The Facebook team will review these documents to get your page back. Always make sure to have more than one admin for your pages.
What Do I Do if My Account Is Hacked?
If your account is hacked, first check where you’re logged in. Go to your Accounts Center from your Facebook profile, select ‘Password and Security’ under Account settings, and then ‘Where you’re logged in’ under Security checks. Log out from any devices you don’t recognize. Then, change your password and set up two-factor authentication to protect your account.
If you need help getting into your account, contact Meta Support.
What Do I Do if My Account Is Restricted?
First, find out why your account was restricted. Was it because you broke the community standards or other rules? Was your account thought to be compromised? Are you a new advertiser? Knowing this can help you avoid future restrictions.
If you want to know how to fix the restrictions, go to the Meta Business Support homepage, click ‘Account status overview’ in the left menu, and select the restricted account. Follow those instructions if there’s a ‘What you can do’ section. If not, you might have to wait for now.
Similar Articles
Is Meta Verified Worth It?: A Review of the Pros and Cons in 2024
How to Create a Reel on Facebook and Get Engagements in 2024
How to Schedule a Post on Facebook: You’re Doing It All Wrong